WordCloudというテキストの傾向を可視化できるツールがあります。
入力されるテキストの中から、単語の出現頻度等を調べ、頻度に応じて文字の大きさや色などを変更して、一枚の画像にして表示することができます。
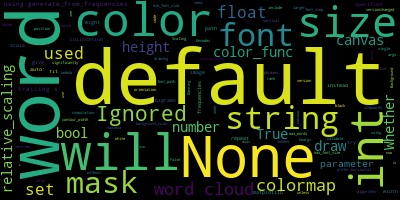
例えば、以下のような画像が1枚生成されます。
用途はさまざまですが、プレゼンテーションの中で、ある出来事の傾向などを掴むために使用されているのをよく見かけます。
例えば学会発表で、学会全体の発表の傾向を知りたい場合に、学会のプログラムのテキストをコピペして入力することで、発表タイトルに登場する単語の出現頻度をベースに学会全体を通してホットなテーマを分析し、印象的に示すことができます。
何かの傾向を知るために、毎回頑張って単語を数えたりするのは大変ですので、このようなときにWord Cloudは非常に強力なツールとなってきますし、使いこなせればプレゼンテーションの質を一つ高めることもできるでしょう。
WordCloudは、Pythonで使えるライブラリが用意されていて、比較的容易に試すことができます。なので、本日はWordCloudでのテキストの分析を行います。
ただし、日本語を入力する場合には少し工夫が必要なので、今回はまず英語のテキストを入力に、WordCloudを使ってみることを第1回とします。
【手順1】 Word Cloudの使用に向けた準備・環境構築
今回はAnacondaの環境構築が完了している前提で、WordCloudの環境を構築します。もしAnacondaの環境構築方法が分からない方は以下の記事の中で紹介されていますので、参考にしてみてください。
Anaconda Prompt上で以下のコマンドを入力することで、WordCloudのライブラリをインストールすることができます。
pip install WordCloud
まずはこのインストールを行ってから、コーディングを進めていきましょう。
【手順2】 Word Cloudの動作確認
まずは簡単なコードでWord Cloudの動作確認をしてみます。自分の作成したオリジナルテキストで分析をしたい方は、【手順3】に進んでください。
This file contains bidirectional Unicode text that may be interpreted or compiled differently than what appears below. To review, open the file in an editor that reveals hidden Unicode characters.
Learn more about bidirectional Unicode characters
from wordcloud import WordCloud
import matplotlib.pyplot as plt
text = WordCloud.__doc__
wordcloud = WordCloud().generate(text)
wordcloud.to_file("word_cloud_result.png")
plt.imshow(wordcloud)
実行すると以下のような結果が得られます。
コードの解説
分析するサンプルテキストを取得する
WordCloudにサンプルのテキストが用意されているので、以下のコードで読み込むことができます。すなわち、自分で用意したテキストを分析したい場合には、この箇所に自分で用意したテキストを入力すればよいということになります。
This file contains bidirectional Unicode text that may be interpreted or compiled differently than what appears below. To review, open the file in an editor that reveals hidden Unicode characters.
Learn more about bidirectional Unicode characters
text = WordCloud.__doc__
WordCloudで分析を実行する
分析を実行するのが「generate()」関数です。この箇所で単語の分析を行います。
This file contains bidirectional Unicode text that may be interpreted or compiled differently than what appears below. To review, open the file in an editor that reveals hidden Unicode characters.
Learn more about bidirectional Unicode characters
wordcloud = WordCloud().generate(text)
分析結果を画像として保存する
「wordcloud.to_file」で画像として結果を保存することができますので、これでプレゼンテーション等に結果を挿入することも簡単にできるようになります。
This file contains bidirectional Unicode text that may be interpreted or compiled differently than what appears below. To review, open the file in an editor that reveals hidden Unicode characters.
Learn more about bidirectional Unicode characters
wordcloud.to_file("word_cloud_result.png")
【手順3】 用意したテキストファイルから分析を実施する
最後に、自分で分析したいテキストファイル「test.txt」を用意した上で、そのテキストをWordCloudで可視化してみましょう。
テストデータとして、今回はコンピュータビジョンのトップカンファレンスであるCVPR2021のAccepted paperのリストを入力してみました。以下にテキストデータにしたものを用意したので、テストしたい方は試してみてください。
では、上記の「test.txt」をWordCloudで分析するプログラムを以下に示します。
This file contains bidirectional Unicode text that may be interpreted or compiled differently than what appears below. To review, open the file in an editor that reveals hidden Unicode characters.
Learn more about bidirectional Unicode characters
from wordcloud import WordCloud
import matplotlib.pyplot as plt
text = open("test.txt",encoding='utf-8').read()
wordcloud = WordCloud(width=1920, height=1080, max_words=200,background_color="white").generate(text)
wordcloud.to_file("word_cloud_result.png")
plt.imshow(wordcloud)
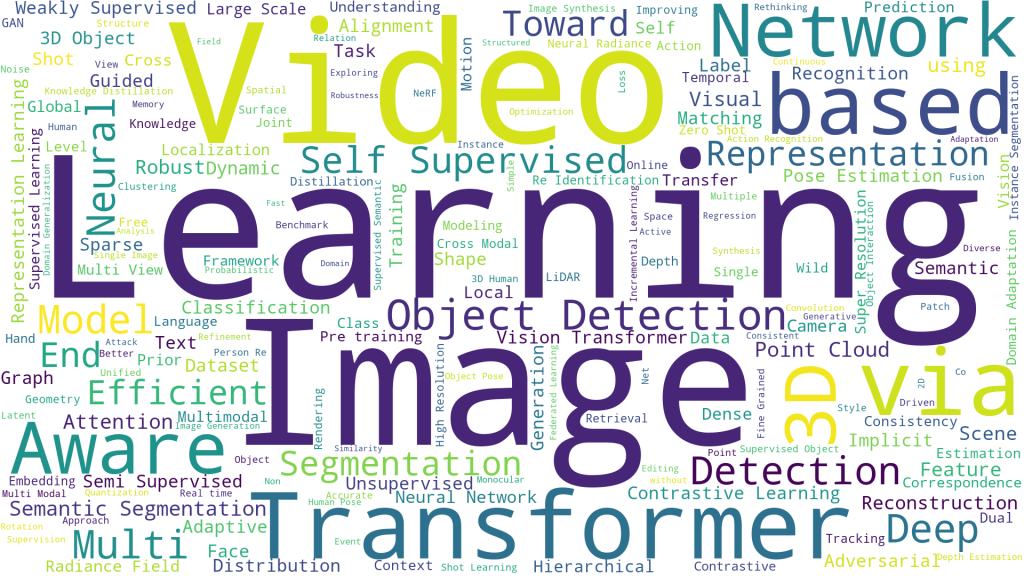
結果は以下のようになりました。
コンピュータビジョンの会議なので「Video」や「Image」、「Learning」などが多いのは当然という印象ですが「Transformer」などの単語もホットのようです。
コードの解説
分析するテキストを読み込む
This file contains bidirectional Unicode text that may be interpreted or compiled differently than what appears below. To review, open the file in an editor that reveals hidden Unicode characters.
Learn more about bidirectional Unicode characters
text = open("test.txt",encoding='utf-8').read()
テキストの文字コードによっては「’cp932′ codec can’t decode byte 0x86 in position 3462: illegal multibyte sequence」等のエラーが出たので、今回は4行目で「encoding=’utf-8’」を指定し、テキストを読み込みました。
WordCloudで分析を実行する
This file contains bidirectional Unicode text that may be interpreted or compiled differently than what appears below. To review, open the file in an editor that reveals hidden Unicode characters.
Learn more about bidirectional Unicode characters
wordcloud = WordCloud(width=1920, height=1080, max_words=200,background_color="white").generate(text)
可読性を高めるために、【手順2】と比較していくつかのオプションを追加してみました。
- 「width=1920, height=1080」の箇所で出力画像のサイズを指定できます。大きめの方が見やすいケースが多いでしょう。ここではFull HD(1920×1080)サイズにしました。
- 「max_words=200」で最大ワード数を指定できます。出力される単語が多すぎる、少なすぎるという場合に調整することができます。
- 「background_color=”white”」で出力される画像の背景色を変更できます。デフォルトが黒(Black)なので、今回はWhiteに変更してみました。
まとめ
本日はWordCloudを用いて、テキストデータの傾向を可視化してみました。
簡単にテキストの傾向を分析したり、プレゼンテーションに華を添える際に、是非試してみてください。